
Jumanji Board- Moving Pieces
Just a demo of how the magnets are working in the piece.


Jumanji Board- 4 days to go!
I’m calling this angry Monday… Needless to say, the silicone I left to set over the weekend did not set. The scales I was using are really unreliable and I think I put way too much catalyst in.
So I had to re-do that section of sculpt and the mould. Boring and a waste of time.
Not to mention the hinges I left drying… One popped off the moment I tried to open the box. Amazing Monday morning.
But I did eventually get the hinges on. (You can also see that I have managed to paint and varnish the playing board. Didn’t take too many pictures of it yet as I’d like to wait until it’s properly completed.)


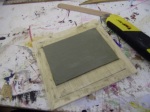
Finally stuck down the fastcast resin board to the inner box.

And after I re-sculpted the little ring that fits around the green resin in the centre I made a silicone mould and got the casts done.


Will be spraying them silver tomorrow and fitting them onto the board. Also need to get the magnets into the playing pieces and paint them up.
Thank god angry Monday is over. Roll on productive Tuesday.
Jumanji Board …Oh the hinges.
Well I got one side on! God knows if the box will open now. It doesn’t look hopeful if I’m honest…

I used steel rod in the centre and cut a slightly larger hole about 1cm in from one end to add wooden dowel. Acts as a stopper, but the actual hinge is very strong inside.

We will see what happens on Monday… Fingers crossed.
I also sculpted a quarter of the metal inner ring today from plastelline.

And made a mould just from gluing plastic around the shape.

Filled with silicone…

That is another thing to wait until Monday for. To see if the silicone sets properly. It was behaving rather strangely when I left today, sort of setting on the top and not at all underneath. Roll on Monday
Jumanji Board- Hinges and Compartments
Yesterday I focused on getting the compartments on the board finished (or nearly finished). I added a magnet to each of the lids, these are attracted to the screws in the bottom section.


and it actually works… I’ve held it upside down and everything.

I started on the hinges today. It was not fun.
This is the test piece, which took far too long, but was necessary :

And yes, the hinges really do look like this on the actual board.

Marked out all the pieces on Birch wood. Decided to use Birch because it is stronger and will hopefully be able to withstand a bit more movement than pine.


This took hours. Literally. Because they are pretty small I had to do a lot of hand sanding… or else risk loosing a finger on the disc sander. Even knowing that, I was pretty risky and got most of it sanded back using it. Did the rest by hand.

Sorry this is a boring post(!) Will be getting the hinges on tomorrow. Hopefully some exciting looking pictures up soon. I have 1 week, so will have to start the paint job pretty soon, and that’s the fun bit.
Jumanji Board- recent progress
So after the bank holiday I’ve managed to get on with some more work on the Jumanji board.
The cast of the ‘board’ and the pattern on the front of the box actually came out with quite a few air bubbles in them. So today was the laborious task of filling and sanding the intricate details


I finally decided it was time to stain the wood darker. I used Brywax- this is the result. Think it looks really good, quite like the fact you can see all the scratches and marks left by sanding. Makes it look old and worn. 🙂


I also worked on the compartments today. Got them attached into the box. Ignore the glue seeping out :-p haven’t got round to tidying it up yet.


Had a little set up of how it’s looking so far. Really happy with the green resin for the middle and the sizes of the playing pieces.


2 weeks to go… I’ll keep you posted.
Jumanji board, today’s work
Things seem like they have slowed down a little, but It’s mainly due to me having to figure out how I’m going to do something.
Today I made the central section of the board (the green, shiny, round bit!)
I made a wooden disc that was the right size and slightly domed. (sorry about the AWFUL picture)

Vac formed it…

Then filled the plastic mould with green pigmented resin. Got to wait until tomorrow for it to cure, then I’ll see if it’s worked and looks accurate.

I also cast the compartment lids in fastcast today, and stuck them to 6mm ply.

Jumanji Board- recent progress.
So this is just a jumble of images from today.
finished carving out all the box edges:

Realised I hadn’t done the compartment lids for inside the box. So I completed that part today. Just needs casting tomorrow


Got these little guys cast

This is everything I have achieved so far!

Feel like I’m getting there. 🙂
Jumanji Board- Moulding and Casting
The silicone moulds came out beautifully.

Caught all the detail really well. So all I needed to do was fill them with fast cast. Because the moulds are quite thin and they don’t have a jacket on them, I just had to make sure the surface of the table was completely flat- hence the spirit level.


Fast cast has a curing time of about 10 mins so I was able to see the outcome pretty quickly. Really pleased with how the casts look. There are a few bubbles in there, but nothing that cant be fixed with a bit of filler.


